Online Presentation Tips: Best practices for making a video
This year, even though the 2021 Annual Meeting is virtual, ARVO is providing a robust forum for researchers to share their science with the eye and vision community. Recording your presentation may be a new experience for you, so below are some tips and advice offered by your colleagues on best practices that might be helpful in creating your video presentation.
Scott F. Schwartz, OD - Sterling Heights, Mich.
Using a Mac to record a video requires no special software. Macs come equipped with iMovie and QuickTime which have all the tools you need. Here are 4 tips on how to record on your Mac and make good transitions in the video:
1. Record the audio; if you are including a video of yourself, record that together with the audio. You can do this over multiple takes as you can load them into iMovie separately, then stitch them all together with QuickTime.
2. Save each of the slides as an image if you want to do the presentation as a slideshow and they can also be brought into iMovie.
3. Load all your media. This tutorial on how to add transitions is a useful resource to check out.
4. Have fun with it. Let's face it, the more fun you have, the more interesting your presentation will be for the viewer.
Jonathan D. Andrews, OD - New Holland, Pa.
The best way to make a video presentation is to dive in! Less thinking, more doing. The creative juices start flowing as soon as the camera starts rolling! As you continue to shoot your presentation, many more ideas will become clear. Please use these tips and tricks to help you make your best video presentation:
1. Show yourself.Whether you have an Android phone or iPhone, many have excellent camera features. At the intro of your presentation it is a nice consideration to show your audience who you are.
2. Shoot horizontally. Televisions have been stretched in many directions over the decades since their creation. However, with the launch of tablets and smart phones, screen orientations can change with a small hand gesture. If you use your cell phone to shoot your video, keep in mind to orient the camera horizontally. This allows viewers on desktop computers, laptops and televisions to see the full screen. Although companies like Instagram, Facebook, TikTok and Snapchat encourage orienting uploaded movies to fill up a vertical smart phone screen, keep in mind who your audience is for this presentation.
3. Make one long video. When shooting your video, it is totally ok to mess up! It is natural to be nervous on a camera, even if it is only you in the room. From an editing and uploading standpoint, it is much easier to edit one long video than 10 small videos. If your words didn’t come out the way you wanted them, simply look back into the camera and start your sentence over. Editing is the next step and these mistakes can easily be cut out.
4. Use editing software.For iPhone users who have a Mac computer, you are in luck. You can shoot your video on your iPhone and easily transfer it to your computer, then use their free software called iMovie to edit. Android and PC users can download free movie editing software like Blender or Lightworks.
5. When frustrated, turn to YouTube.When using editing software for the first time, there will be a learning curve. YouTube has tutorials for just about anything these days. Use this to your advantage.
6. Adjust your volume. When shooting your video, speak slowly and clearly. When editing, please be sure to adjust and leave your computer speakers at a level that is approximately half of your loudest volume. This will allow you to adjust the volume of your video clip to levels that will not be too quiet, or too loud. Nothing is worse than a video with blaring sound. Likewise, it is difficult to hear a video that is soft even when your computer or tablet volume is turned all the way up.
7. Take screenshots. Whether using a Mac or a PC, software exists to take screenshots of your display. Use this to your advantage to create a slide deck for your presentation. These screenshots are easily imported into the editing software and can supplement your video presentation nicely.
8. Proof your video. When you think you are done, export your video to the mp4 format using your software. Before submitting, watch it as if you never saw it before! Make it full screen. Adjust your computer volume to half and listen to make sure the sound quality is not under or overbearing. Check that the video plays smoothly.
9. Send your video to colleagues. When you have a rough draft of your video complete, send it to your colleagues for review to make sure they approve of the language you used in the presentation. The easiest way to share a video is through Google Drive.
10. Upload your video. Once you are happy with your video, complete the process! Directions were sent to presenters on how to upload their video.
Best of luck!
Emily Schehlein, MD - Ann Arbor, Mich. & Tom Wille - Constant Motion Productions
Creating an online presentation is a great opportunity to expand the accessibility of your research and share with a wider audience. There are several ways to create an engaging online presentation, but we will start with a top five list of tips and tricks you should keep in mind:
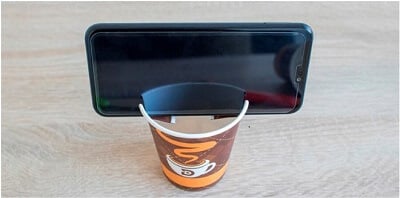
1. Frame the camera appropriately. You can record your video either vertically or horizontally with your cell phone or computer. If you use a cell phone, either have someone record you from no more than five feet away, or you can create a DIY cell phone tripod (find some great examples). Avoid using the zoom feature on your phone as that degrades the image quality. If you want to be closer to the camera, move the camera closer to you!
2. Be cognizant about lighting. Record your message in a well-lit room. You should be facing toward your primary light source so the majority of light is hitting your face, not the back of your head!
3. Record in a quiet location. We understandably compromise video quality by remote filming, but there is no reason to compromise audio quality! Don’t record your video from more than five feet away – the farther you are from the camera’s microphone, the harder it will be for your audience to hear you.
4. Connect with your audience. Make eye contact and smile! Look right into the camera and connect with the camera as you would an audience at a conference. With whatever device you record, try to have the camera at the same level as your eyes so you are not looking up or down as you look into the camera during your presentation.
5. If unsure, do a test video. Send to family and friends for suggestions and additional tips to make sure your online research presentation stands out!
When it’s time to edit, there are a few options you can use:
1. PowerPoint Movie
-
- Record the audio of your presentation with either your cell phone or your computer. An example on how to incorporate audio into your PowerPoint presentation can be found here.
- We recommend recording an audio file for each of your slides, instead of a single 7-10 minute audio file. This will help to sync up your presentation.
- Export your PowerPoint presentation as a movie by going to File > Export > File Format Drop Down Menu > MP4
2. iMovie / Windows Movie Maker
-
- Record audio and video of your presentation with either your computer or your cell phone.
- Export your individual PowerPoint slides by opening PowerPoint > File > Export > File Format Drop Down Menu > JPEG. Change the resolution of your slides to Width: 1920, Height: 1080
- Import your slides and your video presentation into either iMovie or Windows Movie Maker (both are free tools). Use the editing software to incorporate your video and your slides side-by-side into the frame. Cut from one slide to the next by replacing slides on your timeline as your video moves along in your presentation.

- If you have any questions, YouTube tutorials are one of your best resources to learn the basics of editing with either software:
3.At-home Presentation
-
- Connect your computer to a television so you can display your presentation. You can either have someone click through your presentation for you or use a clicker.
- Record your video with either the computer that is also displaying your presentation, or a cell phone framing you horizontally so both you and the presentation are captured during filming.